Wednesday 8 May 2013

Perfect with a cuppa: Gingernuts Recipe

I Love making biscuits, they are so quick and easy to make I often wonder why i don't make them more often, other than my expanding my waistline.

Once you have made biscuits you never really want to go back, in all my baking years I've never made Gingernuts and I'm kicking myself they are divine, cheap, simple and I'm not sure any will be left for my husband.

I turned to my trusted Delia everyday cooking book. I have simply adapted it for a baking when you have little energy.

Spoon Usage 1
Skill level - Novice (great for children)
Cost - 25p  (I'm guessing - assuming you have the staples in your store cupboard)
makes 16
Oven temp 190C Gas mark 5
Middle shelf

Yes that's right 25p and im being overly generous its probably more like 20p

Equipment
Baking sheet
baking parchment
Mixing Bowl
scales
spoons

Ingredients
picture showing the ingredients4oz (110 g) Self Raising Flour
1 rounrded 1tsp ground ginger (so just a tiny bit more than a level spoonful)
1 tsp Bicarbonate Soda
1.5 oz  40g granulated sugar
2oz (50g) margarine
2 table spoons golden syrup

Weigh out the ingredients.

sifted flour, gingers, bicarbonate of soda in a bowlto be honest there is so little prep I'm going to just do the recipe.

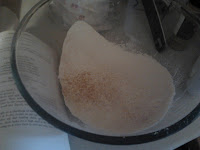
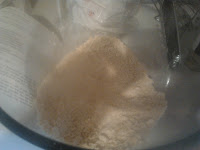
1. Weigh out the flour, add the bicarb of soda and the ginger - sift into a large bowl.

2. add the sugar - give a little stir

3. add the margarine and rub the flour until it resembles fine breadcrumbs.

mixture - looking like bredcrumbsHave  a little rest at this point if needs be, but it only takes a few seconds if the margarine is soft. you could do this stage in a food processor if you like.

4. Add the golden syrup and mix into a stuff paste. trust the recipe at this stage as you might think it will never come together.

I discarded the spoon and used my hands, i found it much easier to bring it together and the warmth of my hands helped bind it. keep going until it forms a ball.

have a little rest.

5. make little balls try and make them the same size - this will make 16 in total.


NB if like me you have an old tin use the baking parchment - i dob a little marg on the tin to stop the parchment moving about. If you have a non stick tray you dont need parchment.

 6. place on a large baking sheet - space them well apart. press each ball down slightly.

7. put in centre of the oven for 10 minutes.
Tip: Biscuits cant go from under to over done very quickly, depending on your oven you can cook them for up to 15 minutes but mine were slightly over at 12. 

8.  when they come out they will still be a bit soft. don't worry they will be perfect once cooled. place on a cooling rack- Once cool will be nice and crunchy.

Have to say these were delicious - just gingery enough, crunchy and so much nicer than shop bought ones. It took so little time to make.

finished gingernut with a cuppa
Enjoy :-)


Sunday 5 May 2013

Coronation Chicken #PerfectPicnicFood

I love coronation chicken, its a great way to jazz up your lunch box, have on a picnic or makes a great jacket potatoes filling. Its a really good way to use up left over roast chicken or a couple of chicken thighs. If your an end of the day shopper and can grab a reduced fresh cooked chciken this dish is perfect if its a bit dry and you want to make a lovely supper.

The curried mayo is also lovely as a dressing in itself and works well if you have a chicken drumstick and want to jazz it up when its cold.

There are many variations on this recipe, but i like to keep it simple and let the chicken sing out rather than swamp it with loads of other flavours.This recipe also works very well with turkey

Spoon usage - 1
Kitchen skill - novice
Cost - £1.20 **its hard to be accurate as i tend to make it when i have left over chicken and use store cupboard staples. main cost if you were doing this from scratch would be the chicken.
Serves: 4 - 6 small portions or fill 2 large jacket spuds

Ingredients
chicken portions breast  & thigh meat - 200g of
picture showing the ingredients2 dessert spoons of mango chutney
1 tsp curry power
handful of sultanas soaked
Toasted almonds* optional
dash of lemon juice
**2 dessert spoons mayo
**1 dessert spoon natural yogurt
1 tea bag
dash of lemon juice

**If you just have mayo use that, the yogurt just give its a lighter creamier consistency
  
prep
sultanans soaking in a tubsoak the sultanas you want them nice and plump - bear with me soak them in very weak tea. Ok I know it seems odd but it brings out the sweetness - soak for half an hour
chop up the chicken in good size pieces

Putting dish together

1. heat up a frying pan once hot add the generous teaspoon of curry powder and dry fry for 30 seconds

mango chutney and curry powder in a pan2. turn down the heat and add the mango chutney - I used cheap sainsburies basic which has a sharp jam like edge to it so its very much to taste - if you have good quality stuff you might only need 1 dessert spoon full. you can always add more later.

3. remove from the heat and add the mayo 1 spoon at a time, taste as you go - I like a nice sharp taste with mild curry background flavour. 

Tip - once chilled the flavour will develop so dont worry if you cant taste the curry flavour at first. it does work honest 
creamy curried mayo

4. Darin the sultanas and add to the chicken

5. add the curried mayo - I don't like things swimming in mayo, but my husband does so i put aside extra in a pot for him to pour over as a dressing later. add a dash of lemon juice to give it a zing

6. chill for at least an hour then taste at this point you might want to add more mango chutney but hopefully the flavours will be nicely balanced. a creamy, slightly sharp, mild curried flavour chicken dish.

showing finised dish

Enjoy


Saturday 4 May 2013

Spicy Bean Burgers

This recipe is lovely, cheap and easy to make. High in protein, can be made with very cheap ingredients and freeze well. Even if your not vegetarian I hope you will enjoy them.You can leave out the egg and bread to make them vegan if you wish to or cant have bread.

This is a great recipe to make with children, as they can get their hands in and squish the beans up, takes very little manual dexterity and you can adapt the spice level to your taste. I have tried to make them aromatic than spicy hot.

I have used 1 tin of mixed beans Ive had kicking around in the back of the cupboard for ages, plus 1 i bought specially. If your virtually out of cash you can make these burgers with 1 onion, 1 can of cheap kidney beans and some spices made into a paste to bind it together. so can be made for less than £1.00 for 6 burgers

Beans are a great source of protein, are low in carbs low on the glicemic index (GI) meaning they slowly release thier energy and are all round good guys when your living on a low budget.

Spoon usage 1 - 2
Skill level - novice
Overall cost £1.40 - if you substitute mixed beans for just kidney drops  the cost to about 50P
Makes 6 large burgers

Ingredients
picture showing ingredients required for making spicey bean burgers2 x 400g can of mixed beans - Ive used a combination of mung, kidney, chickpea, soya and cannelloni
1 onion or 3 spring onions
1 slice of brown bread (or white if that's what you have) *optional

1 small red chilli deseeded
1 small pepper (or half a large one) 
Salt & pepper
1 generous tsp Cumin
1 generous tsp Coriander
1 dessert spoon Paprika
Oil 
Egg optional

spices in a pestle and mortar
spice paste
Prep
Open and drain the cans of beans - rinse well
finely chop the onion ( or use pre chopped if you cant chop them yourself) - I tend to grate onion
finely chop the chili discard seeds if you want a milder kick  
finely chop the pepper
crumble the bread into breadcrumbs
crush the spices and mix well - use ground spices if you prefer or don't have fresh spices.


Have a rest - the prep can take as much or little time as you like.

Putting Burgers together

1. gently dry fry your freshly mixed spices to bring out their flavour* omit this part of you are using
ground spices. once done add a small amount of oil and water to create a paste

2. Gently fry the onions, you dont want to colour them just fry until translucent, add the peppers and gently fry for 2-3 minutes

3. mash the beans - but leave them chunky you don't want a smooth paste. you can blitz in a food processor, use a potatoe masher or get your hands in and squish. don't over do it as you need to add the other ingredients you just want them broken up enough for the bean to take the other flavours.

4. add the onions, peppers, spice paste,bread crumbs to the bowl and mix until the ingredients are well incorporated. i tend to use my hands as I can feel how well the mixture holds its shape, if it feels a bit dry add some oil. I tried it with an egg when i first made them and it was too wet. so you I would suggest if you use a egg beat it first and add a very small amount at a time - you want it to hold its shape not become too wet

Tip: if you do make them too wet - dont fret just follow all the steps and pop them into the freezer for an hour to firm up and it should be fine. or add some flour to the mixure if needs be


5.  I don't like huge fat burgers so tend to make them into hand sized patties. its totally up to you.

shape the burgers - to save my hands from getting sore I use the lid of a coffee jar -  place a piece of cling film in the jar and squish the mixture into it - pat flat and then twist the cling film so the burger is wrapped.


6.freeze the burgers you dont paln to eat now - will keep for up to 3 months

7. fry the burgers on a medium heat until hot all the way through, and golden brown. about 5 minutes


 I serve them with salad in a wrap.


Enjoy - You can add more or less spice to them depending on taste. I like them mild and often add a bit of sweet chili dipping sause to them once cooked.

Monday 22 April 2013

Express - Mackerel Pate

This a lovely and very easy recipe, it will take me longer to type the recipe up than make it. The recipe literally takes 2 minutes to make - and is delicious.


Ingredients

2 Mackerel fillets - if you like the peppered variety use that - I used a tin of them (100G)
1 pot of *Quark for the virtually fat free version - 250G
juice of half a lemon - or good dash of bottled if you don't have fresh

Black Pepper (omit if using peppered fillets)

*I used quark as its fat free, for a creamier texture use a cream cheese  (250G)

You could use Sardines, Salmon or Crab for this

Total Cost
 £1.60 serves 8 (at least - depends how thick you slather it on £0.30 per portion

Prep

If you have an electric processor pop it in and blitz for 30 seconds if you like a rough texture, or blitz until smooth if you prefer it like that. add Black pepper and lemon juice to taste.

If you have a hand held wand type thing will work just as well.

If you don't have any gadgets - stick the mackerel and quark in a bowl using a fork blend together - then us a wooden spoon to beat it - you wont get quite such a smooth pate but it tastes divine

You should leave to stand for 10 mins in the fridge to thicken slightly or if you cant waste, slather it on what ever you fancy. I have Rivetta.

It makes loads - enough to keep you going for a few days.

Enjoy

Monday 8 April 2013

Pork & Chorizo Burgers - Guest Blog

My lovely Foodie Friend Sarah sent me this, yay fab recipe om nom nom. We love pork burgers in this house, much cheaper and healthier than beef.


  Pork (and chorizo burgers)

Spoonage – I think this is an easy 1 maybe 2 spoon recipe but Beth may look at it and revise the spoon number
Cost - £1.14 for 500g mince on offer from Lidl this week (if making chorizo ones a half pack of chorizo costs about £1.25) and 65p for 6 buns

So without chorizo and assuming you have some spices  approx £1.79 for 4 burgers and buns
with the chorizo element £3.04.  I buy little packs of chorizo split into 2 for paella and other dishes so I had the chorizo in the fridge.  The original recipe called for bacon but the burgers I did without either chorizo or bacon were lovely. 

Please be gentle with me this is my first time food blogging!  The amount of  ingredients make 4 burgers so it either feeds a hungry 2 folk or with salad and other bits serves 4.

Ingredients
1x500g pack of pork mince
1x clove of garlic
pinch of salt
some pepper
mixed herbs/sage or I used a few grinds of a polish set of mixed spices

If adding in Chorizo I left out the garlic clove and salt because its quite spicy and salty in its own right.

How to:

       
      1. Put the meat (and chorizo if using) in a mixing bowl.
2. Crush your garlic (if using) into the bowl
3. Add in the rest of your spices – ½ -1 teaspoon of mixed herbs and a pinch of salt and pepper
4. Mix it all together – it should get squidgy and stick together very quickly.  I mix by hand but if you don't like touching raw meat a wooden spoon would be fine.
5. If needed have a sit down and pop the meat in the fridge to chill 


 6. When ready take a handful of the meat mince and roll it into a ball then squish it flat on a baking sheet.
7. When they are all done you can pop them back in the fridge again to firm up slightly I normally get impatient so this doesn't take too long in our house but you can leave them for about  20 mins to let the meat rest

8. I put them onto cook on the lowest heat on a griddle pan to make sure that they cook through properly.  Pop them in and leave the for a good 5 mins to make sure that the underneath starts to cook.  If you don't then you tend to find they may fall apart if you constantly flick them over and over.

                                               9. Turn them every 4 or 5 minutes to stop them burning on one side and I cooked mine for about 25 mins to ensure they are cooked.

10.  Just recently I've been watching a few cooking programmes that suggest you can poke meat and if it feels firm to the touch then it is cooked.  I tried it with these and it seemed to work but to be on the safe side (because I have small children) I cut mine in half just to make sure they were cooked and they were.

Finished products in the pan:
Pork and Chrizo Burgers


Tuesday 12 February 2013

Leek and Potato Soup (Slow Cooker)

This is a lovely rich soup - considering its only got 3 main ingredients its yummy, very easy to make and doesn't require any fancy gadgets. It can be made in a pan or slow cooker.
I have adapted this recipe for the slow cooker. if you want to make it in a pan just ask for the recipe ;)

You need to go easy on the seasoning, until the end as the flavour is deeper than cooking it on a hob.
This is a really nice soup the added milk gives it a creamy texture that  I really like. If you don't like milk or cant have it just leave it out. You might want to add some herbs to give it a bit more oomph - chervil, parsley or thyme work well

Spoon usage 1
Skill level -Novice
serves 2 large portions or 3 small
Cost £0.80

Ingredients
2 small or 1 large leek
2 - 3  medium sized potatoes
1 medium onion
3/4 pint chicken or veggie stock)
125 Ml Milk (can be left out or use a milk substitute eg soya)
Salt and pepper
*knob of butter (optional)

Prep
slice the leeks - cut length ways (remove the tough outer layer) then slice thinly
dice the onions - finely chop the onions
peel and dice the potatoes- you want to dice into small cubes
Make the stock - 1 cube to 3/4 pint boiling water

Rest

slow cooker method

1.pre heat the slow cooker for 20 minutes on high

2. Use a small amount of oil and pop in the leeks, potatoes and onions - leave to soften in the oil for 20 - 30
    minutes you want to stir a couple of times.

3. lightly season - add more later

4. Pour in stock and milk

5. Set slow cooker to low (cook for 9 hours) I usually do this over night or high for 4-5 hours

6 . Stir once or twice during this but generally leave well alone. taste and add more seasoning if needed

7.  Once all the veg is soft and well cooked either liquidise half of it, I like my soups to have a bit of
     substance rather than smooth. If you don't have a hand help liquidiser, use a potato masher

8.  Serve with some grated cheese or fresh parsley & fresh warm bread if you like it


* This is an adapted recipe from Delia Smith

Cauliflower Surprise

This is a childhood favourite of mine, its a variation of the classic cauliflower cheese. Its such an easy recipe, that's a stick to your ribs winter comfort dinner. When I was a child the surprise was always what else was in there - I think my mum used what ever she could afford really. I put ham or bacon in it but you can leave it out if you are vegetarian.

This is an oven baked dish, but I'm sure would work just as well in the slow cooker - you would need to steam the cauliflower first as you leave it in big chunks. Its a very versatile dish, can be served with macaroni, mash or on its own with some steamed cabbage Nom Nom.

Other than the claulli you can pretty much add what ever veg you like or have, the original recipe has tomatoes in it, but i don't like the combination of creamy cheese sauce and tomatoes.
If you cant have a cheese sauce or don't like it then a spicy tomato sauce works very well for this too.

Spoon usage  3
Skill - some skill
cost - £3.50
serves 4 ( use a small cauliflower and halve the rest of the ingredients for a smaller portion)

Ingredients
1 medium - large cauliflower
1 medium onion or 1 leek
1 small courgette
1 red pepper (or any colour you have)
*hand full of peas (optional)
*hand full of sweetcorn  (optional)
*100G smoked bacon or ham (leave out for vegetarian version)
1 pint of milk
100G hard cheese
2 tble oil
3 heaped tbl flour
2 tps Paprika

Prep
remove outer green leaves but don't throw them away- cut into 4 pieces, dont cut away the thick white stem you want the florets whole.
chop the onion - roughly chop
slice the courgette - good size chunks
slice the pepper - roughly chop
cut the bacon into lardons (small pieces) or shred the ham into bite size pieces

1. part cook the cauliflower - steam for 15 mins simmer for 10 (you just want to start the process off don't over cook - you want the florets to still be firm)

2. Drain and set aside

Rest

Make the cheese sauce

**If you dont have the energy, time or confidence to make the sauce - use a packet mix or jar of white sauce. The white pasta sauce type things are fine, you can just heat them up add some more milk to thin them down to a pouring consistency (thick double cream) add grated cheese til its melted - and follow the rest of the steps.

Cheese sauce
1 pint of milk
90G hard cheese grated  ** leave this is up to you and how cheesy you like it - set some aside for later
2 tbs oil
3 tbls flour
salt & pepper

use a heavy bottomed saucepan and whisk

1. Pour in the oil and heat over a medium low heat - you want to warm the oil not make it too hot

2. Add the flour and whisk til its smooth, keep stirring and cook the flour out for 1 - 2 minutes turn down
   heat, if it looks too dry add a tiny bit more oil

3. Add the milk and whisk, you need to keep stirring in a figure of 8 motion to avoid getting any lumps.
   when the sauce reaching a slow bubble and is thick (you want a thick double cream consistency) add the
   cheese, pinch of salt and pepper.

4. Whisk until thick and smooth - take off heat

5. If you need a little rest at this point - get some cling film put it on top of the sauce to stop a skin forming

Rest

Putting dish together

1. pre-heat oven to 200C gas mark 6

2. Gently fry the onion until translucent, add in the peppers and courgette. cook on a low heat for 3 - 4
    minutes -  put the veg into a deep oven proof dish, add the peas and sweetcorn

3. If using bacon fry until crispy - then add to the oven proof dish and stir in

4. Place the cauliflower quarters on top of the veg - sprinkle on 2
   tps paprika

5. Pour on the cheese sauce so it covers the cauliflower evenly.

6. Sprinkle on the saved grated cheese be as generous as you like.

7.  Bake in the centre of the oven for 30 - 35 minutes

8. Steam the outer leaves - treat like cabbage (discard the hard stalk
    just use the green cabbage like leaf) wash thoroughly and discard the
   outer part -or cook what ever veg you fancy I used carrots


Serve with mash, baked potato, pasta or crusty bread.


*** Note - you could adapt this for a slow cooker - just follow steps above and cook on low for 7-8 hours or high for 4-5 hrs. if you want a browned top spoon onto a heat proof dish and brown under the grill

Monday 11 February 2013

1 week, 2 people, £35 quid

Living on a very small budget is not easy, but it is possible to have interesting and varied meals, planning ahead is key and if like us you are a meat eater buying 1 type of meat for the week allows you to plan a series of meals and cut your costs down. You don't need meat every day, so throwing in a few veggie meals and it is possible to have well balanced, filling and delicious food.

Buying a mixture of fresh, packaged, reduced and pre -prepared all go into the mix. we don't always have time or inclination to cook something from scratch, so being realistic is  important. We always have a few fall back things in the cupboard and freezer..like oven chips, fish fingers and my husbands fave cauliflower cheese grills. This blog isn't about making anyone feel they should do anything, its purely about recipes and ideas you might want to try.

before deciding on meals for the week - check the fridge and freezer. Yes i know that sounds obvious but its surprising how often we don't and end up throwing things away because we haven't used them up.I'm certainly guilty of it, on such a limited budget we cant afford to do that..and well its bad form as captain hook would say.

a few tips if this is all new to you and you have suddenly found yourself juggling a tiny budget

Tips 
  • Bulk buy fortnightly (if your on a benefit that pays out every 2 weeks) meal plan and shop accordingly 
  • Buy a few treats even on a tiny budget of sod all if you like pot noodle or fish fingers have something nice that's a  "I'm fed up of this crap" - mine is nice vanilla ice - cream
  • If you don't have much of a store cupboard buy 1 thing every shop so you build it up over time
  • **Freeze wine, left over stock even milk -
  • Take a calculator and know when a bargain is a bargain
  • its worth paying a little more for some things like tinned tomatoes 
  • try and buy seasonally its cheaper. 
**Im sure some will throw thier hands up in horror at freezing wine - however we rarely buy it, but it add lots of flavour to some recipeies. we pour the wine into ice cube trays.
This week we had a full store cupboard we just needed to replace Mung beans and coriander seeds.
The fridge had
2 leeks
half a bag of spuds
whole bag of onions (LM bought a huge bag last week)
2 carrots
Pot of natural yogurt
Blueberries
Lemon
2 Eggs
1 bottle red wine (thanks mum in law)

I love pouring over recipe books, and chatting about what we fancy eating, my husband likes spicy food, were as im a bit of a wuss with spice. After a bit of intense marital discussion.. we decided the humble mince would have a starring role in this weeks dinners. Buying one type of meat, like a whole chicken, a load of mince etc allows you to get more from it and make your budget go further. Mince is very versatile

The trick with meal planning is you buy only what you need for a recipe.Supermarkets are good at packaging it all so you can never quite get the amount you need and end up paying more. If you cant get to a butchers, try out the butcher and deli counter - sometimes they have offers on and you can buy just the right amount you need.

Bearing in mind what we had - we decided on:

Breakfasts: porridge for me, malty cereal for my husband

Lunch - My husband works full time and takes a packed lunch, as I'm at home i either have soup or pittas
Spicy Lentil Dal pasties
Stuffed pittas - Egg salad
Soup
Blueberry & lemon cakes (variation of Orange and Cranberry cup cakes)

Sunday Lunch - Leek & Potato soup (using left over leeks and spuds from last week)
Sunday dinner - Cauliflower Surprise

Monday - Savoury mince, veg and mash (may yet be a Shepheard's pie)

Tuesday - Meatballs in Tomato Sauce & Pasta

Wednesday - Chili con Carine in jacket spuds

Thursday - Lasagna, Salad & garlic bread followed by Apple pudding *well it is valentines day

Friday -  Cauliflower & Veg Curry, Nan bread and Rice

any left overs will be frozen

Our total spend for 2 adults was £35.00 - we aim to keep it below £40 a week for both of us this includes stuff like washing powder, light bulbs etc. which pushes the cost up

Shopping list:
from the market
cost £4.50
Large Cauliflower
1Lb carrots 
3 x Bramley Apples
3 courgettes
4 large king Edwards (baking and mash)

£4.00 for mung beans, green split peas and coriander seeds from a market stall - we could have got them a tiny bit cheaper in the supermarket but hey the stall holder complimented me on my hat.

Supermarket £19.00
750G Mince
Pitta bread
fresh ginger
2 little chilli's
3 slices of nice ham
 6 x yogurts
pack of jelly
cheese
baked beans
Clover (marg)
non edible house bits and bobs - kettle descale etc
peppers
Rye Bread
Pack of granose veggie burger mix (for the store cupboard)
Milk 4 pinter
Bread Mix

My husband does all the chopping, i cant manage it but you can use pre chopped veg, tinned, frozen or a gadget to do the hard work. when you work out your meal plan you will know what you can do or manage.
This blog isnt just aimed at people like me who cant physically manage to cook.

I will write up the recipes over the week and post them up.


Sunday 10 February 2013

Make your own Jelly Pot Treats

this is a short blog - im working on a longer weeks meal planner one.

I love little pots of jelly and fruit - it is enough to satisfy my sweet tooth, why i hadn't thought of this before i will never know. We normally buy me 3 for a quid type pots. usually 49p each.

yesterday when we were shopping suddenly had the idea Doh!

1 pack of jelly - 40p makes 1 pint - you quick veggie jelly crystals
1/2 tin cheap peaches - 20p  - or what ever fruit you like (whole tin is 32p)
empty yogurt pots (we have loads as its my husbands sweet treat)

*you only need half a tin - you can freeze the peaches so they can be used for something else or more jelly pots later on

Have worked out that i can make 6 big pots of jelly and fruit in a standard 125 yogurt pot
or 12 if you add more fruit

Makes 4 large or 8 -10 small pots
Total cost 59p
this compares to the 49 p each pot usually costs.

4 x 125g yogurt pots 14 pence
8 x 75g fromage frait pots 7 pence

Spoon useage 1 (if that)

1. follow instruction to make up jelly - usually tear jelly apart into a heatproof jug, pour on boiling  water and disolve

2. open tin - chop up peaches into small pieces

3. let jelly cool (but not set, you dont want to melt the yogurt pots)

4. put fruit segments into emplty clean yogurt pots

5. pour on jelly

6, stiir

7, cover pots with clingfilm

8. enjoy

vary quatity accoridng to how much you want to make


Im sure doing a fruit compot and custard combo would work out equally well and be super cheap indeed - i shall experiment.
Id love to hear your money saving tips on making little pots of sweet treats.


Sunday 3 February 2013

Savoury Pasties

I love making pasties, I will get round to sharing my traditional Cornish pasty recipe soon. Pasties are cheap and tasty, they are great for packed lunches. The tradition of the humble pasty is an interesting one, In Cornwall the thick crust was for the tin miners to hold and throw away (their hands were covered in poisonous tin deposits)  The pasties had both a sweet and meaty filling - the meat on one side, sweet on the other.  

I  used a bread mix for the pasty - that might seem odd but i got the idea from the Hairy Bikers. I was very sceptical but not only is it lower in fat, the "pastry" is very nice indeed.
You could also use short crust, puff or rough puff pastry too..

Savoury Minced Beef Pasty
This is very cheap to make, using  a small amount of a few ingredients, you can use the cheapest mince for this if needs be, the condiments you use add lots of flavour. This savoury one can work just as well with veggie mince. I have added lentils to the mixture. Lentils are not only a great source of fibre and iron, they also bulk out meals. 

Spoon usage 2/3
Kitchen Skill - novice to some skill
cost £2 - 33p per pasty (20p per small)
Makes 6 medium  or 10 small

Gadgets
food processor (if you have one)
Mixing bowl
Rolling pin

Tips/Adapting
If the pastry is too difficult to make by hand (it requires some dexterity) use pre rolled pastry either short crust or puff
Make pastry in a food processor if you have one
If chopping is too much then grate the veg - works just as well

Ingredients
Filling
100g mince beef or veggie mince
1 medium carrot
1 onion or small leek
1 medium potato
2 handful of red lentils* (optional just use more veg)
handful of frozen peas
1/2 pint boiling water
1 beef stock cube  - use veggie stock cube if making veggie version
good dash worcestershire sauce  (use hendersons relish for veggie alternative)
1 tsp ketchup
1tsp brown sauce
Salt & pepper

Pastry
250 packet bread mix
150 Ml hand hot water
(that's half a packet of a small bread mix)

Prep
dice or grate the:
carrots
potato
onion or leek
make beef stock - dissolve stock cube in the boiling water
heat the over to 190C or gas mark 5

Rest

Filling
1. brown the mince - if you have used a cheaper mince drain off the juices and excess fat

2.add onions or leeks, cook on a medium heat until the onion is translucent, season with salt & pepper

3. add the worcestershire sauce, ketchup & brown sauce to the beef stock and stir well, pour on to the meat

4. add the carrot, potatoes and peas and lentils

5. cook on a low heat (you want it to be just bubbling) until the lentils are plump - you may need to add more liquid.

6 leave to go cold

Rest - if you are too tired at this point, put the filling in the fridge will be fine over night


Pastry
1.make the dough according to the packet mix and follow instructions - up to baking
  Or make what ever pastry you fancy, or use the pre made stuff.

2.roll out the dough until its 2-3 mill thick - use a small plate to cut out a circle - repeat until
  you have 6.

3. spoon the mixture into the centre of the circle, use a little but of mil to wet the edge nearest you.

4.  fold over the back edge towards you and using a fork press along the edge to seal them. I use a Cornish
    pasty crimp action but using the fork is fine.

5. brush the pastry with milk or an egg wash 

5. place in the centre of the oven for 30-35 minutes.


Monday 28 January 2013

Chicken & Ham Pie

This is a lovely recipe, its very spoonie friendly as it doesn't involve making pastry. Its also low fat, tasty and filling. If like me you love pie but want to watch your weight too then I hope you enjoy this recipe.

Spoon Use 2
Skill - some kitchen skills
cost £4  - halve the ingredients for 2 people

Serves 4  adults (if you have a small appetite or children this pie could serve 6)

Gadgets
Heat proof  deep Pie Dish - if you dont have a pie dish a cake tin will do
Pastry brush (if you don't have one use your finger or a clean small paint brush)
Electric food chopper - if you need one
whisk
sharp knife & board

Ingredients
2 chicken breast (you can use boneless thighs - use 4 large or 6 small) - remove the skin
2 slices of ham
1 medium leek
1 onion
1 vegetable stock cube
1/4 pint of milk
1 packet filo pastry
cornflour
small amount of vegetable or sunflower oil

Prep
Make 1 pint of stock - (using the stock cube and boiling water)
finely chop the onion (use electric chopper if needed)
thinly slice the leeks
cut the ham into pieces -  roughly 2" squares

1. put the chicken breasts into a saucepan (i cut them in half to reduce cooking time) pour on the stock, bring to the boil then reduce to a simmer - poach gently for 20 minutes.  This keeps the chicken moist and the cooking liquor wont be wasted. Once poached turn off the heat and leave to cool

Rest once you have put the chicken on to poach

Making the pie filling

1. cut the chicken into bite size pieces (don't throw away the liquid) then set aside
2. put the onions and leeks into a fryingpan and cook gently, you don't want them to colour. Cook for 5 minutes until soft

4. Put the pan with the cooking stock back on the heat, add the milk and season with salt and pepper. Bring to the boil

5. Mix 2 heaped tea spoons of corn flour with cold water so it forms a paste, pour into the stock - whisk constantly and turn the heat down, the liquid should thicken - you want the consistency of thick double cream. add more corn flour if it doesn't thicken enough. keep whisking until thick - remove from heat.

6.  Take the onions and leeks off the heat, add the chicken and ham pieces. Pour on enough sauce to coat the mixture - you don't want it swimming in sauce.Leave to go cold Don't be tempted to put the filling in the pie case while its still warm, you will end up with a soggy bottom - the same will happen if you use too much sauce. 

** I freeze the left over sauce to use another time. 

Rest

Make the pie

Turn on the oven - 180C gas mark 5

1. Take the filo pastry out of the packet - use 4 pieces of the pastry for the base of the pie. Using the pastry brush very lightly brush oil in the 1st piece of pastry, and lay the second piece on top in the opposite direction so it sort of forms a cross (filo pastry is oblong) brush the second layer and add the third and fourth at at angle so it forms a star shape- *see diagram

 lay the strips into the pie dish as you go, you want the edges overlapping the dish - don't cut them you want these bits in a minute.


Add caption
2. Put the cold filling into the dish spread evenly

3. split the rest of the filo pastry,  lightly oil and scrunch up a piece and put it on top of the pie - repeat until you have covered the pie in the centre

4. pull the overlapping bits of pastry and use this to seal the pie, again brushing with oil if you need it. Its a bit like paper so if you handle it gently you can manipulate it ok.

This is easier to do than describe :)

5. put the pie in the centre of the oven and cook for 30 - 40 minutes


6 while the pie is in the oven cook the veg you fancy having with it, we had mash, cabbage and carrots

Note: This pie freezes very well  - you can also make small individual pies. I have used filo pastry as its low fat and gives a nice texture. You can make short crust pastry, or if you dont fancy pie at all its lovely on its own.

Sunday 27 January 2013

Orange and Cranberry Skinny Cupcakes

This is a lovely and very simple low fat recipe - Ive adapted it from the Hairy Dieters Lemon and Blueberry cup cake recipe.

This recipe will make 12 deep cupcakes or 24 small fairy cake size (perfect for lunch boxes) I love this recipe not just for its low fat credentials, but also its ease and simplicity.
The cupcakes are a cross between a traditional sponge and muffin. You don't need a huge amount of skill to make them. from prep to oven in less than 5 minutes.

The cakes keep extremely well for a week in the air tight box.
  
Spoon Usage - 2 
Skill - some cooking knowledge
Cost  18P per cake (9p if you do fairy cake size)

Gadgets -nothing specialist
Muffin/cake tin
Paper cake cases (deep or shallow)
Mixing bowl
whisk
Measuring jug
measuring cups (these measure out teaspoon etc if you don't have some well worth the £1 outlay)
big metal spoon

Ingredients
200G self raising flour
1 tsp bicarbonate of soda  
75g soft Brown sugar (if you don't have any use white caster sugar)
100g cranberries
1 small lemon
2 large eggs (or 3 medium)
50 ml veg or sunflower oil
150g natural yogurt
2 tbs milk
100g icing sugar

Prep - 5 minutes
weigh out all the dry ingredients
grate the orange rind (thats the skin if you are new to baking) use a fine grater don't go down to the pith (the white bit)
measure out the wet ingredients
put paper cases into the tin
turn on oven to 200 C or gas mark 6

Rest

Mix the dry ingredients

1.  sift the flour into a large bowl
2. Add in the sugar
3. add bicarb of soda
4. add in cranberries

5. stir until combined evenly

If needed take a little rest here

Mix the wet ingredients

1. Beat the eggs until smooth, you want them to be light, fluffy and slightly pale
2. pour oil into the bowl 
3. add natural yogurt
4. add milk

5. give a good whisk so all the ingredients are combined - don't worry if it looks a little curdled

Mixing ingredients

1. Make a well in the centre of the dry ingredients (flour etc)

2. Pour the wet ingredients into the bowl

3, take a large metal spoon working quickly, using a figure of 8 motion, mix it together so its just combined (dont over mix or beat it together ) once all the flour is combined this is enough. I find using a big spoon it takes 3 - 4 stirs to do this.

Hope you can see its just mixed..you dont want to knock the air out
4. using a tea spoon - fill the paper cups about - so they are 2 thirds full


my hands wobbled - messy cook :)

5. place in the centre of the oven for 16-18 minutes

 rest and pop the kettle on in anticipation

set your timer and once cooked - you can tell they are cooked if golden brown, and slightly springy to the touch - if your not sure insert a skewer or thin knife if it comes out clean then they are cooked


leave to cool 

6. put the icing sugar in a bowl, cut the orange in half and squeeze the juice from 1 half into the sugar..stir until smooth. you can go for thick icing or thick and syrupy your choice. If you fancy it then use orange butter icing


7. cooks privilege eat the 1st one with a cuppa


Wednesday 23 January 2013

Frugal Chicken Pot Roast

This recipe is a firm favourite in our house - not only does it taste good but its perfect for days when you have no spoons, its low on prep time and great for the slow cooker. If you dont have one you can do it in the oven.

Im cooking this in the slow cooker

Skill - Novice
Spoon Usage - 1
Cost approximately - £2.00  £1.00 per portion  ( i say approximately because it depends on how much the chicken is - we buy whole chickens and chop them up - which makes it cheaper - will post how to do that soon)
Servse 2 adults (double quantities if more people - or 1 for you and 1 for freezer if your solo cooking)

I like this dish, it light and herby, you can be a little more adventurous if you like by making cheese scones or dumplings to have with it, or thickening the stock if you want a thicker gravy.
We often have it with mash, so if you fancy that don't put the potato in and make mash with it.

If like us you are trying to watch your weight, you can remove the skin - this reduces the calories significantly, chicken legs don't tend to dry out as much, so you can get away with it. - I haven't taken the skin off today - as didn't have the spoons.

Ingredients
2 x Chicken legs (you can use thighs  or a thigh & drumstick combination)
2 x medium Carrot (use frozen or fresh pre-chopped)
2 handfuls of frozen peas (fresh or tinned is fine)
I large onion or 2 small
1 Litre chicken stock (use stock cube if you don't have fresh - or make a thin gravy)
1 large potato
Tarragon (or mixed herbs if you don't have tarragon)
Salt and Pepper

Prep - less than 5 minutes 
The beauty of this recipe it takes moments to put it together, there is no lengthy spoon sapping standing, stirring or processes.

1. roughly chop the  carrots into large chunks (note if you use a slow cooker you need smaller chunks than for an oven)  - or use whole frozen carrots, or pre cut carrot sticks or chunks (you can use tinned carrots too)

2. do the same for the potatoes, i don't peel them as its too painful and i like the skin, but its your choice - you want the potatoes to be a similar size to the carrots*

Tip: if you are new to cooking -  root veg like carrots & potatoes cook at a similar rate so making them a similar size means you don't have to cook the dish longer because one of the veg is still raw.

3. roughly chop the onions

4. make the stock or thin gravy if you don't have fresh stock.

 5. get peas out of the freezer :)

Putting dish together

1. put all the veg into the slow cooker pot mix them up so they are evenly mixed up (easier for serving later) season with a small amount of salt and pepper

2. pour on the stock so it just covers the veg, there should be enough liquid for the chicken to just sit in the stock
my hand wobbled a bit so slightly more tarragon than intended

3. season (salt and pepper) then sprinkle on tarragon (or herb of your choice) you can add garlic if you want to

4. pop the lid on and turn it on 

Cooking time

Slow cooker -  6 - 7 hours if you are using whole chicken legs, it depends on  the size of your slow cooker,
 if you use small thighs and chop the veg up into smaller pieces you can reduce the cooking time.

Oven - cooking time 1 hour gas mark 5 180C - again depending on oven

How do i know its cooked?
you should be able to push a knife into the veg with ease, place the chicken on a plate and if the juices comes out clear its cooked.

If you like more veg than add some on the side, i still have cabbage left over so will steam that.

Enjoy